
Introduction
In this article, we will create a simple React app from scratch. We will not use any templates or helper scripts. We aim to reduce tool usage and fully understand each step of the process.
What is React?
React is a popular JavaScript library for building user interfaces. It was created by Meta (Facebook) and is maintained by Meta and a community of developers. React is used to build single-page applications (SPAs) and dynamic web applications.
Prerequisites – Node.js and npm
Node.js and npm are the most popular tools for working with React. Node.js is a JavaScript runtime. npm is a package manager for Node.js. These two tools are essential for modern web development.
package.json
We will start by creating a package.json file. This file contains metadata about the project and its dependencies. You
can use the npm init command to create the package.json file. Or create one yourself containing something like:
{
  "name": "react-hello-world",
  "version": "1.0.0",
  "description": "Hello world app using React",
  "repository": "https://github.com/getvictor/react",
  "author": "getvictor",
  "license": "MIT"
}
TypeScript
Next, we will add TypeScript to our project. TypeScript is a superset of JavaScript that adds static types to the language. It helps catch errors early in the development process and improves code quality.
Although TypeScript is not required to build a React app, it is strongly recommended. TypeScript is widely used in the React community and provides many benefits. Modern IDEs, such as Visual Studio Code and WebStorm, support TypeScript, making development and learning easier.
npm install --save-dev typescript
This command updates the package.json file with the TypeScript dependency.
{
  "name": "react-hello-world",
  "version": "1.0.0",
  "description": "Hello world app using React",
  "repository": "https://github.com/getvictor/react",
  "author": "getvictor",
  "license": "MIT",
  "devDependencies": {
    "typescript": "^5.4.5"
  }
}
It also creates a node_modules directory. This directory contains the packages installed by npm.
Finally, the command creates a package-lock.json file. This file locks the dependencies to specific versions, ensuring
that the project is built with the same versions of the dependencies across different machines.
The --save-dev flag tells npm to save the package as a development dependency. Development dependencies are not
required for the production build of the app.
tsconfig.json
We need to create a tsconfig.json file to
configure TypeScript. This file specifies the root
files and compiler options for the TypeScript compiler. We will extend the recommended base configuration.
Install the recommended configuration with the following:
npm install --save-dev @tsconfig/recommended
Then, create a tsconfig.json file with the following content:
{
  "extends": "@tsconfig/recommended/tsconfig.json",
  "compilerOptions": {
    "jsx": "react-jsx"
  }
}
What is JSX?
In our tsconfig.json file, we set the jsx option to react-jsx. This option tells TypeScript to treat JSX as React
JSX.
JSX is a syntax extension for JavaScript. It allows you to write HTML-like code in JavaScript. JSX is used in React. It is syntactic sugar that is generally transpiled into JavaScript by the build tool.
React and ReactDOM
Next, we will add React and ReactDOM to our project. React is the base library. ReactDOM is the package that provides DOM-specific methods for React.
npm install react react-dom
Since we are using TypeScript, we must also install type definitions for React and ReactDOM. The TypeScript compiler uses these definitions for type checking.
npm install --save-dev @types/react @types/react-dom
What is Webpack?
Webpack is a module bundler for JavaScript. It takes modules with dependencies and generates static assets representing those modules. We will use Webpack as the build tool for our React app.
We will install the Webpack packages:
npm install --save-dev webpack webpack-cli webpack-dev-server html-webpack-plugin ts-loader
webpackis the core packagewebpack-cliprovides the command-line interface, which we will use to run Webpack commandswebpack-dev-serveris a development server that serves the apphtml-webpack-pluginwill generate the index.html file to serve our appts-loaderis a TypeScript loader for Webpack. It allows Webpack to compile TypeScript files.
webpack.config.ts
By default, Webpack does not need a configuration file. However, since we use TypeScript, we must create a
webpack.config.ts file to configure Webpack.
Note that we use the .ts extension for the configuration file. The TypeScript compiler will compile this file. Using a
.js file is also possible, but we prefer TypeScript for type safety.
No additional type definitions are required for our Webpack configuration at this time.
import HtmlWebpackPlugin from 'html-webpack-plugin';

module.exports = {
    entry: './src/index.tsx',
    module: {
        rules: [
            {
                test: /\.(ts|tsx)$/,
                loader: "ts-loader",
                exclude: /node_modules/,
            },
        ],
    },
    plugins: [new HtmlWebpackPlugin()],
}
We specify src/index.tsx as our app’s top-level file. By default, the build’s output will go to the dist directory.
We configure the TypeScript loader to compile .ts and .tsx files.
We also use the html-webpack-plugin to generate an index.html file. This file will load the Webpack bundle.
We need to add a TypeScript execution engine to the Node.js runtime so that it can understand the above TypeScript
configuration file. We will use ts-node for this purpose.
npm install --save-dev ts-node
Final package.json
After all the installations, our package.json file should look similar to this:
{
  "name": "react-hello-world",
  "version": "1.0.0",
  "description": "Hello world app using React",
  "repository": "https://github.com/getvictor/react",
  "author": "getvictor",
  "license": "MIT",
  "devDependencies": {
    "@tsconfig/recommended": "^1.0.6",
    "@types/react": "^18.2.79",
    "@types/react-dom": "^18.2.25",
    "html-webpack-plugin": "^5.6.0",
    "ts-loader": "^9.5.1",
    "ts-node": "^10.9.2",
    "typescript": "^5.4.5",
    "webpack": "^5.91.0",
    "webpack-cli": "^5.1.4",
    "webpack-dev-server": "^5.0.4"
  },
  "dependencies": {
    "react": "^18.2.0",
    "react-dom": "^18.2.0"
  }
}
src/index.tsx
We are finally ready to write some React code. TSX files are TypeScript files that contain JSX.
We will create the src/index.tsx file. It will render a simple React component. React components are the reusable
building blocks of React apps.
import React from "react";
import {createRoot} from "react-dom/client"

// A simple Class component
class HelloWorld extends React.Component {
    render() {
        return <h1>Hello world!</h1>
    }
}

// Use traditional DOM manipulation to create a root element for React
document.body.innerHTML = '<div id="app"></div>'

// Create a root element for React
const app = createRoot(document.getElementById("app")!)
// Render our HelloWorld component
app.render(<HelloWorld/>)
Running the app on the Webpack development server
Now, we can run the app on the Webpack development server. This server will serve the app and automatically reload the page when the code changes.
node_modules/.bin/webpack serve --mode development --open
The --mode development flag tells Webpack to build the app in development mode. The --open flag tells Webpack to
open the app in the default browser.
The browser should show the following:
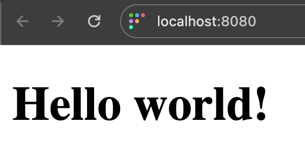
React app served by Webpack dev server
package.json scripts
Instead of remembering the above webpack command, we can add a script to the package.json file to run the Webpack
development server.
  "scripts": {
    "start": "webpack serve --mode development --open"
  }
start is a special script name that maps to the npm start command. Now, we can run the development server with:
npm start
or
npm run start
Building the app for production
To build the app for production, we can run:
node_modules/.bin/webpack --mode production
This command will create a dist directory with the app’s production build. The directory will contain the index.html
file and the main.js JavaScript bundle. The production files are optimized for performance, and they are minified and
compressed to reduce their size.
It is possible to host these production files on a local HTTP server like Apache or Nginx, or deploy the app to cloud providers such as AWS, Cloudflare Pages, Netlify, Render, or Vercel.
Other getting started guides
- Recently, we wrote about
creating a Chrome extension from scratch without any additional tooling.
- As part of that series, we covered adding linting and formatting tooling for TypeScript.
- We also have a guide on using CGO in Go programming language.
Example code on GitHub
The example code is available on GitHub at https://github.com/getvictor/react/tree/main/1-hello-world
React Hello World video
Note: If you want to comment on this article, please do so on the YouTube video.