This article is part of a series on mTLS. Check out the previous articles:
- mTLS Hello World
- mTLS with macOS keychain
- mTLS Go client
- mTLS Go client with custom certificate signer
- mTLS Go client using macOS keychain
Why use Windows certificate store?
In our previous articles, we introduced mTLS and demonstrated how to use mTLS client certificates and keys. Keeping the mTLS client private key on the filesystem is insecure and not recommended. In the mTLS Go client using macOS keychain, we demonstrated achieving greater mTLS security with macOS keychain. In this article, we start exploring how to achieve the same level of protection with Windows certificate store.
The Windows certificate store is a secure location to store certificates and keys. Many applications, such as Edge and Powershell use it. The Windows certificate store is an excellent place to store mTLS client certificates and keys.
The Windows certificate stores have two types:
- User certificate store: Certificates and keys are stored for the current user, local to a user account.
- Local machine certificate store: Certificates and keys are stored for all users on the computer.
We will store our client mTLS certificate in the user certificate store and the other certificates in the local machine certificate store.
Generating mTLS certificates and keys
We will use the following Powershell script to generate the mTLS certificates and keys. OpenSSL must be installed on your computer.
New-Item -ItemType Directory -Force certs

# Private keys for CAs
openssl genrsa -out certs/server-ca.key 2048
openssl genrsa -out certs/client-ca.key 2048

# Generate CA certificates
openssl req -new -x509 -nodes -days 1000 -key certs/server-ca.key -out certs/server-ca.crt -subj "/C=US/ST=Texas/L=Austin/O=Your Organization/OU=Your Unit/CN=testServerCA"
openssl req -new -x509 -nodes -days 1000 -key certs/client-ca.key -out certs/client-ca.crt -subj "/C=US/ST=Texas/L=Austin/O=Your Organization/OU=Your Unit/CN=testClientCA"

# Generate a certificate signing request
openssl req -newkey rsa:2048 -nodes -keyout certs/server.key -out certs/server.req -subj "/C=US/ST=Texas/L=Austin/O=Your Organization/OU=Your Unit/CN=testServerTLS"
openssl req -newkey rsa:2048 -nodes -keyout certs/client.key -out certs/client.req -subj "/C=US/ST=Texas/L=Austin/O=Your Organization/OU=Your Unit/CN=testClientTLS"

# Have the CA sign the certificate requests and output the certificates.
openssl x509 -req -in certs/server.req -days 398 -CA certs/server-ca.crt -CAkey certs/server-ca.key -set_serial 01 -out certs/server.crt -extfile localhost.ext
openssl x509 -req -in certs/client.req -days 398 -CA certs/client-ca.crt -CAkey certs/client-ca.key -set_serial 01 -out certs/client.crt
# Create PFX file for importing to certificate store
openssl pkcs12 -export -out certs\client.pfx -inkey certs\client.key -in certs\client.crt -passout pass:

# Clean up
Remove-Item certs/server.req
Remove-Item certs/client.req
The maximum validity period for a TLS certificate is 398 days.
The localhost.ext file is used to specify the subject alternative name (SAN) for the server certificate. The localhost.ext file contains the following:
[alt_names]
DNS.1 = localhost
DNS.2 = myhost
We can access the server using either localhost or myhost names.
The above script generates the following files:
certs/server-ca.crt: Server CA certificatecerts/server-ca.key: Server CA private keycerts/client-ca.crt: Client CA certificatecerts/client-ca.key: Client CA private keycerts/server.crt: Server certificatecerts/server.key: Server private keycerts/client.crt: Client certificatecerts/client.key: Client private keycerts/client.pfx: Client certificate and private key in PFX format, needed for importing into the Windows certificate store
Importing the client certificate and key into the Windows certificate store
We will import the client certificate and key into the user certificate store using the following powershell script.
# Import the server CA
Import-Certificate -FilePath "certs\server-ca.crt" -CertStoreLocation Cert:\LocalMachine\Root
# Import the client CA so that client TLS certificates can be verified
Import-Certificate -FilePath "certs\client-ca.crt" -CertStoreLocation Cert:\LocalMachine\Root
# Import the client TLS certificate and key
Import-PfxCertificate -FilePath "certs\client.pfx" -CertStoreLocation Cert:\CurrentUser\My
The command result should be similar to the following:
   PSParentPath: Microsoft.PowerShell.Security\Certificate::LocalMachine\Root

Thumbprint                                Subject
----------                                -------
0A31BF3C48A3D98A91A2F63B5BD286818311A707  CN=testServerCA, OU=Your Unit, O=Your Organization, L=Austin, S=Texas, C=US
7F7E5612F3A90B9EB246762358251F98911A9D1A  CN=testClientCA, OU=Your Unit, O=Your Organization, L=Austin, S=Texas, C=US


   PSParentPath: Microsoft.PowerShell.Security\Certificate::CurrentUser\My

Thumbprint                                Subject
----------                                -------
E2EBB991E3849E32E934D8465FAE42787D34C9ED  CN=testClientTLS, OU=Your Unit, O=Your Organization, L=Austin, S=Texas, C=US
By default, the private key is marked as non-exportable. A user or an application cannot export the private key from the certificate store. They can only access the private key via Windows APIs. Using a non-exportable private key is the recommended security approach. You can use the -Exportable parameter if you need to export the private key.
Verifying imported certificates and keys
As an extra step, we can verify that the certificates and keys exist in the Windows certificate store. We can use the certlm Local Machine Certificate Manager GUI, certmgr User Certificate Manager GUI, or the Get-ChildItem powershell command.
Get-ChildItem -Path Cert:\LocalMachine\Root |
        Where-Object{$_.Subject -match 'testServerCA'} |
        Test-Certificate -Policy SSL

Get-ChildItem -Path Cert:\CurrentUser\My | Where-Object{$_.Subject -match 'testClientTLS'}
Running the mTLS server
We will use the same docker-compose.yml file from the mTLS Hello World article. The docker-compose.yml file starts two nginx servers:
- https://<your_host>:8888 for TLS
- https://<your_host>:8889 for mTLS
We can run Docker on WSL (Windows Subsystem for Linux) or another machine. We will run it on a different machine, so we need to copy the certs directory to the machine running Docker. When running the server on a different machine, we must update the C:\Windows\System32\drivers\etc\hosts file to point to the other machine.
10.0.0.5 myhost
Connecting to the TLS and mTLS servers with clients
Because we added the server CA to the root certificate store, we can now access the TLS server without any additional flags:
Invoke-WebRequest -Uri https://myhost:8888/hello-world.txt
Result:
StatusCode        : 200
StatusDescription : OK
Content           : TLS Hello World!

RawContent        : HTTP/1.1 200 OK
                    Connection: keep-alive
                    Accept-Ranges: bytes
                    Content-Length: 17
                    Content-Type: text/plain
                    Date: Sun, 03 Mar 2024 17:28:29 GMT
                    ETag: "65b29c19-11"
                    Last-Modified: Thu, 25 Jan 2024 1...
Forms             : {}
Headers           : {[Connection, keep-alive], [Accept-Ranges, bytes], [Content-Length, 17], [Content-Type, text/plain]...}
Images            : {}
InputFields       : {}
Links             : {}
ParsedHtml        : System.__ComObject
RawContentLength  : 17
However, we cannot access the mTLS server directly.
Invoke-WebRequest -Uri https://myhost:8889/hello-world.txt
The client attempted the TLS handshake, but the server rejected the connection because the client did not provide a certificate. Result:
Invoke-WebRequest : 400 Bad Request
No required SSL certificate was sent
nginx/1.25.3
At line:1 char:1
+ Invoke-WebRequest -Uri https://myhost:8889/hello-world.txt
+ ~~~~~~~~~~~~~~~~~~~~~~~~~~~~~~~~~~~~~~~~~~~~~~~~~~~~~~~~~~
    + CategoryInfo          : InvalidOperation: (System.Net.HttpWebRequest:HttpWebRequest) [Invoke-WebRequest], WebException
    + FullyQualifiedErrorId : WebCmdletWebResponseException,Microsoft.PowerShell.Commands.InvokeWebRequestCommand
We can, however, provide the client certificate thumbprint to access the mTLS server. We saw the thumbprint of the client certificate earlier when we imported it into the Windows certificate store.
Invoke-WebRequest -Uri https://myhost:8889/hello-world.txt -CertificateThumbprint E2EBB991E3849E32E934D8465FAE42787D34C9ED
Result:
StatusCode        : 200
StatusDescription : OK
Content           : mTLS Hello World!

RawContent        : HTTP/1.1 200 OK
                    Connection: keep-alive
                    Accept-Ranges: bytes
                    Content-Length: 18
                    Content-Type: text/plain
                    Date: Sun, 03 Mar 2024 17:31:55 GMT
                    ETag: "65b29c19-12"
                    Last-Modified: Thu, 25 Jan 2024 1...
Forms             : {}
Headers           : {[Connection, keep-alive], [Accept-Ranges, bytes], [Content-Length, 18], [Content-Type, text/plain]...}
Images            : {}
InputFields       : {}
Links             : {}
ParsedHtml        : System.__ComObject
RawContentLength  : 18
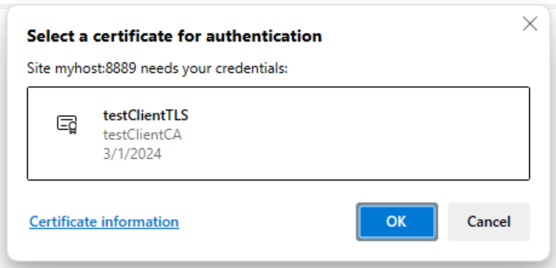
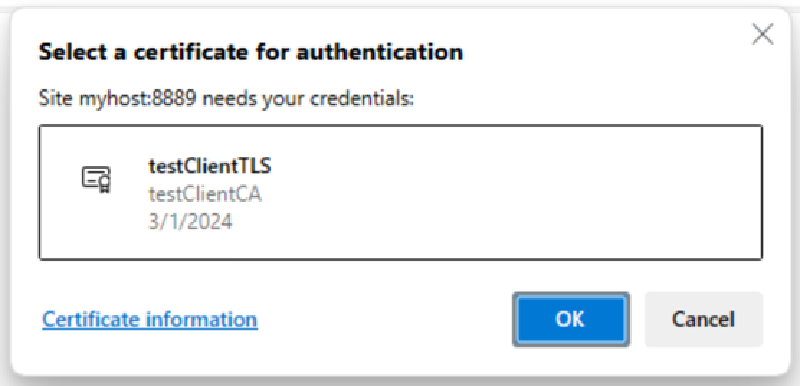
Edge browser can access the mTLS server. We can verify this by opening the following URL:
https://myhost:8889/hello-world.txt
We see the following popup:

Edge mTLS popup
We can click OK to connect to the mTLS server. Future connections will not show the popup and will automatically use the client certificate.
Note: Here is a helpful link that may resolve issues trying to use mTLS client certificates on Windows 10: https://superuser.com/questions/1181163/unable-to-use-client-certificates-in-chrome-or-ie-on-windows-10
Example code on Github
The example code is available on GitHub at https://github.com/getvictor/mtls/tree/master/mtls-with-windows
Creating our own Windows mTLS client
In the following article, we will create a custom Windows mTLS client using the Windows certificate store.
Further reading
Recently, we wrote an article on testing a Windows NDES SCEP server.
mTLS with Windows certificate store video
Note: If you want to comment on this article, please do so on the YouTube video.
