- Create a CloudFront distribution
- Create a CloudFront key pair and add it to a key group
- Associate the key group with the CloudFront distribution
- Generate a signed URL using AWS SDKs
What is CloudFront CDN?
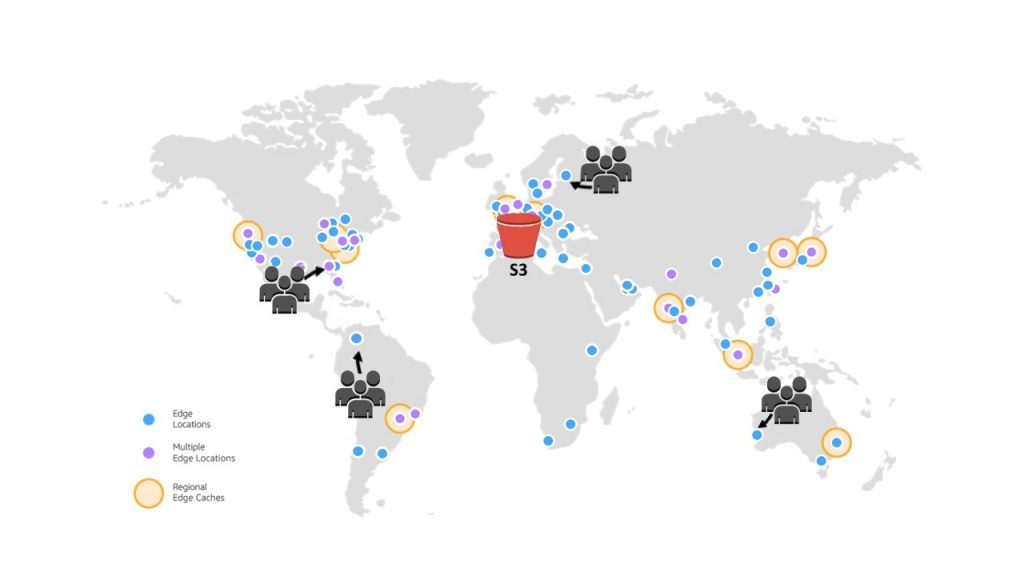
Amazon CloudFront is a content delivery network (CDN) service that securely delivers data, videos, applications, and APIs to customers globally with low latency and high transfer speeds. CloudFront is a popular choice for serving users worldwide with static assets, such as images, videos, and software package files.
CloudFront uses S3 buckets, EC2 instances, and other AWS resources as origins to cache and serve content. When a user requests a file from a CloudFront distribution, CloudFront checks its cache for the file. If the file is not in the cache, CloudFront retrieves it from the origin and caches it for future requests.

Users around the world requesting data from their local Cloudfront CDN cache
What are CloudFront signed URLs?
CloudFront signed URLs grant access to private content served by CloudFront. By default, CloudFront distributions are public and serve content to anyone who requests it. However, your signed URLs can restrict access according to some of the following rules:
- source IP address
- begin access time and/or expiration time
Signed URLs are helpful when you want to serve private content to specific users or for a limited time. For example:
- Serve paid content to customers who have purchased a subscription
- Share private documents with a specific group of users
- Provide temporary access to a file for a limited time
- Serve content to users without requiring them to log in
A signed URL looks like a regular CloudFront URL but contains additional query parameters that specify the access restrictions. Depending on the limits you apply, a signed URL may be quite lengthy.
How to create CloudFront signed URLs
You must have an AWS account and an S3 bucket with private content as a prerequisite.
Create a CloudFront distribution
- Open the CloudFront console.
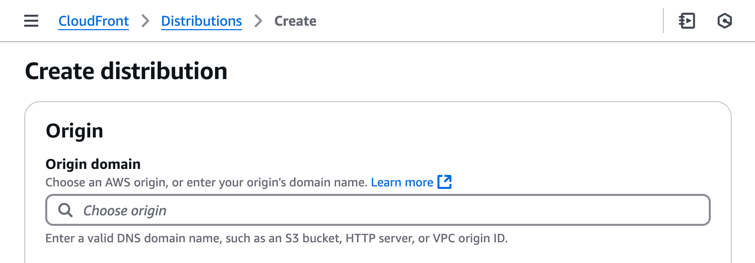
- Choose Create Distribution.
- In the Origin domain section, choose your S3 bucket as the origin.

- In the Origin access section, select Origin access control settings (recommended) and click Create new OAC.
- In the Create new OAC modal, click Create.
- Choose one option in the WebApplication Firewall (WAF) section.
- Click Create Distribution to create the CloudFront distribution.
- In the yellow The S3 bucket policy needs to be updated banner, click Copy policy and then click Go to S3 bucket permissions to update policy.
- Under bucket Permissions > Bucket policy, click Edit and paste the copied policy.
- Click Save changes.
- Back in the CloudFront console, wait for the distribution to deploy. When the distribution is done deploying, the Last modified column will change from Deploying to a date and time.
At this point, the CloudFront distribution will serve content from the S3 bucket to anyone who requests it. Signed URLs do NOT protect it until we set them up in the following steps. Test the distribution by accessing a file using the CloudFront URL.
Create a CloudFront key pair and add it to a key group
The recommended method for signing URLs is using trusted key groups. A key group is a collection of public keys that CloudFront uses to verify signed URLs.
- Use OpenSSL to generate a private key and a public key:
openssl genrsa -out private_key.pem 2048
openssl rsa -pubout -in private_key.pem -out public_key.pem
- Open the CloudFront console.
- In the side menu, choose Key management > Public keys.
- Click Create public key.
- Enter a name for the key, paste the contents of the
public_key.pemfile, and click Create public key. - Remember the key ID for a later step.
- In the CloudFront side menu, choose Key management > Key groups.
- Click Create key group.
- Enter a name for the key group, select the public key you created, and click Create key group.
Associate the key group with the CloudFront distribution
- Open the CloudFront console.
- Click on the CloudFront distribution you created.
- In the Behaviors tab, select a behavior and click Edit.
- In the Restrict viewer access section, select Yes, choose the key group you created, and Save changes.
Now, the CloudFront URL will only serve content to users using a signed URL with the private key. Accessing content without a signed URL will result in an access denied 403 error.
<Error>
  <Code>MissingKey</Code>
  <Message>Missing Key-Pair-Id query parameter or cookie value</Message>
</Error>
Generate a signed URL using AWS SDKs
You can generate signed URLs using the AWS SDKs for various programming languages. Amazon provides examples for several languages. We will show an example using the Go SDK.
In a new directory, create a Go project and add the AWS SDK as a dependency:
go mod init cloudfront-signed-urls
go get github.com/aws/aws-sdk-go-v2/feature/cloudfront/sign@v1.8.3
Copy the private_key.pem file to the project directory and create a new Go file with the following code:
Run the Go program to generate a signed URL:
2025/01/06 08:52:46 Signed URL: https://d1nsa5964r3p4i.cloudfront.net/hello-world.txt?Expires=1736178766&Signature=HpcpyniNSBkS695mZhkZRjXo6UQ5JtXQ2sk0poLEMDMeF063IjsBj2O56rruzk3lomYFjqoxc3BdnFqEjrEXQSieSALiCufZ2LjTfWffs7f7qnNVZwlkg-upZd5KBfrCHSIyzMYSPhgWFPOpNRVqOc4NFXx8fxRLagK7NBKFAEfCAwo0~KMCSJiof0zWOdY0a8p0NNAbBn0uLqK7vZLwSttVpoK6ytWRaJlnemofWNvLaa~Et3p5wJJRfYGv73AK-pe4FMb8dc9vqGNSZaDAqw2SOdXrLhrpvSMjNmMO3OvTcGS9hVHMtJvBmgqvCMAWmHBK6v5C9BobSh4TCNLIuA__&Key-Pair-Id=K1HFGXOMBB6TFF
The signed URL will expire in 1 hour.
Potential issues
- Server side encryption (SSE) may be an issue. AWS-managed KMS keys are not supported by CloudFront. One solution is to switch to a customer-managed KMS key.
Further reading
- Recently, we explained launchd agents and daemons on macOS.
- Previously, we set up a remote development environment for our web app.
Watch how to start using CloudFront signed URLs
Note: If you want to comment on this article, please do so on the YouTube video.
